Pick Which Walls Set Slope Roof Revit

Wall By Face Part 2 Creating A Slanted Wall Tool Wall Create Face

Revit Roof Basics 10 Slope Arrow Cadclips Youtube

How To Create A Thatch Roof In Revit Micrographics Thatched Roof Thatch Roof

Revit Tutorials Roofs Youtube

Revit Roof Edits Increasing The Overhang Revit Architecture Autodesk Revit Roof

Roof Diseno De Teja Courtain Wall Part 2 Roof Tiles Roofing Roof
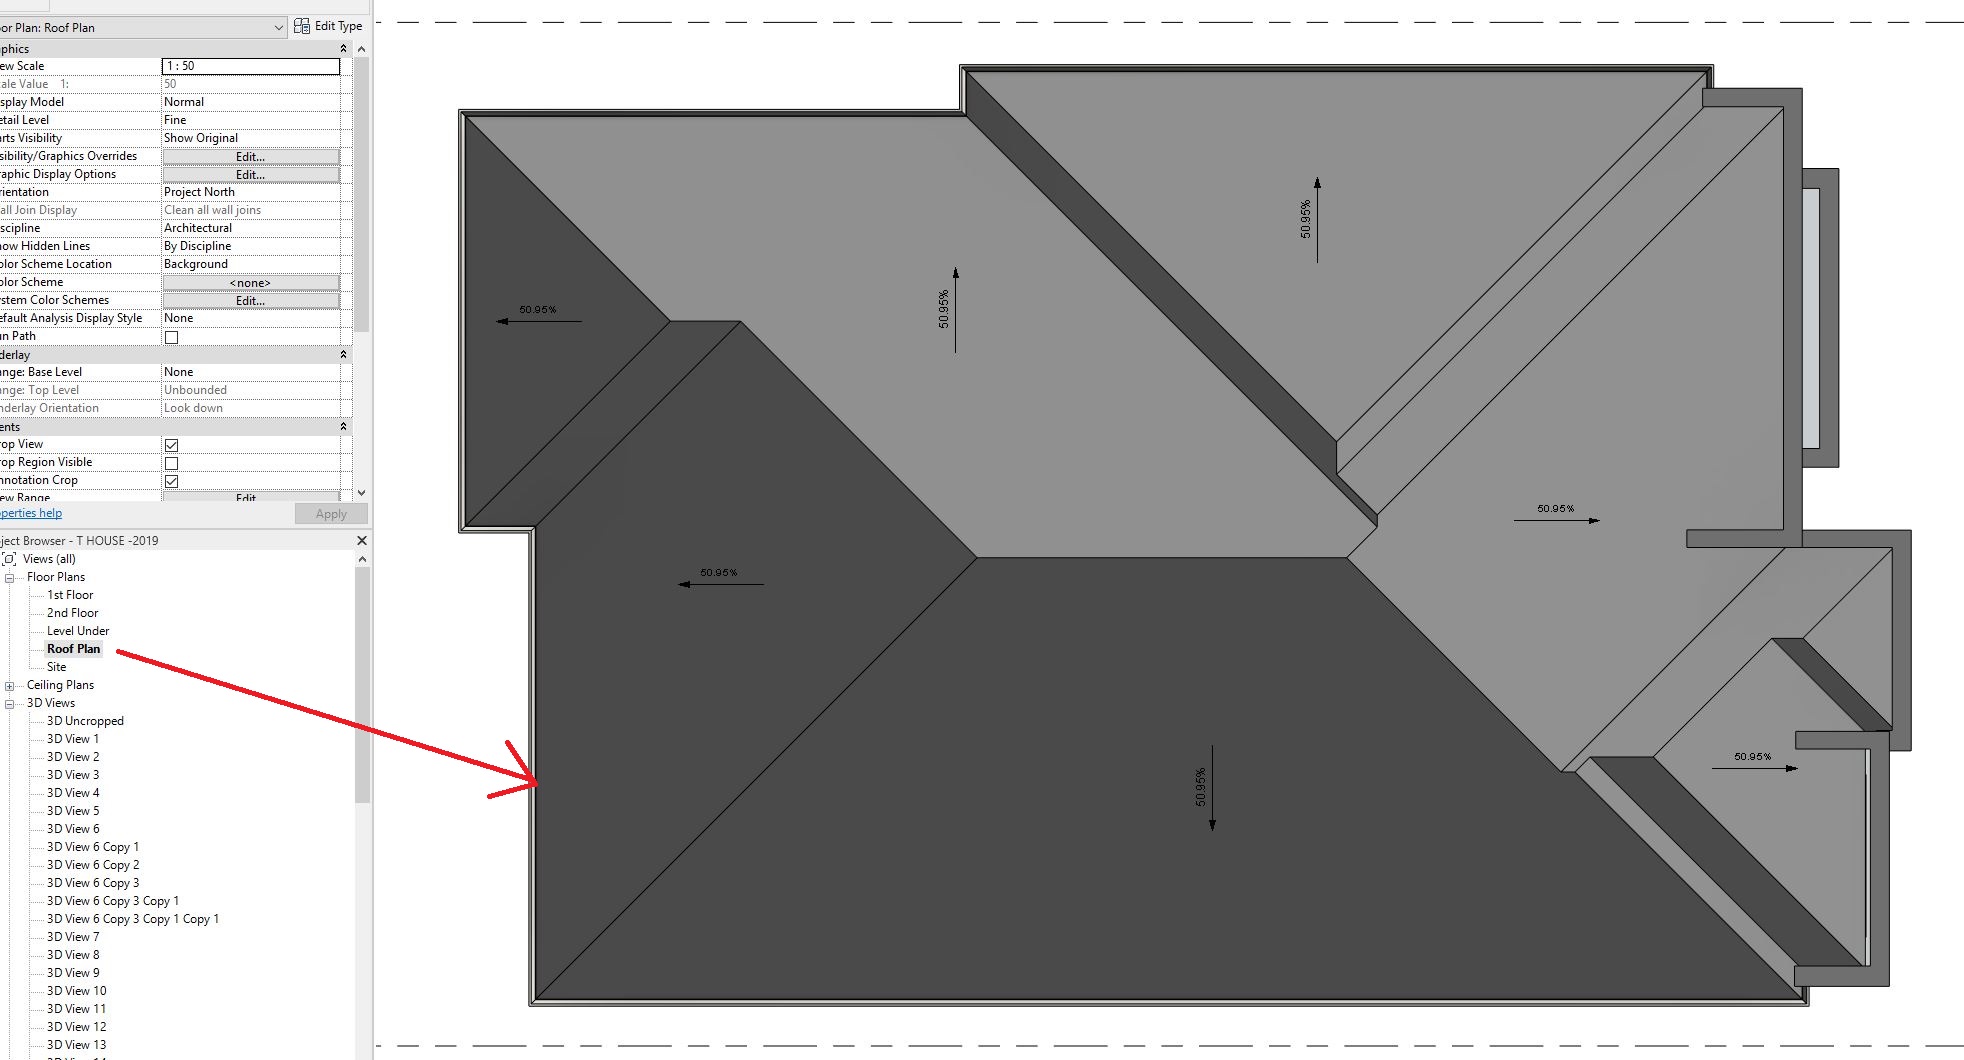
5 activate overhang on picked walls roofs.
Pick which walls set slope roof revit. On the draw panel click pick walls. 4 activate overhang on picked walls roofs. Specify slope defining lines. Create a sloped roof in revit step 1 draw your roof step 2 define the slope.
Select each boundary line and set the value in properties or in option bar. On the options bar for overhang enter 600 and select defines slope. You can set an overhang on roofs created with pick walls. In the example the lines at either end are given the defines slope property and the slope was set to match the falls of the roof above which is 30degrees in this instance.
Sketch or pick a closed loop for the roof. Create a sloped roof with an overhang. To change the slope definition of a line select the line and on the properties palette click defines roof slope. To change the slope definition of a line select the line and on the properties palette click defines roof slope.
Select each boundary line and set the value in properties or in option bar. You can set an overhang on roofs created with pick walls. Specify slope defining lines. Modifying revit roof slopes to change the roof from a gable roof to hip roof go into the sketch options select all boundary lines and turn on the defines slope parameter note as a default your roof will have a slope of 30 degrees on all boundaries and form a hip roof unless you change the slope designation in the sketch mode per boundary line.
Use pick walls if you want the roof to automatically adjust when walls are moved. When a roof line is set to slope defining this symbol appears adjacent to it. Use pick walls if you want the roof to automatically adjust when walls are moved. When a roof line is set to slope defining this symbol appears adjacent to it.
You can then change the slope value. You can then change the slope value. In the drawing area highlight an entry wall.

Attaching Walls To Roofs

Roof Truss Systems Roof Trusses Roof Truss Design Truss Structure

Https Encrypted Tbn0 Gstatic Com Images Q Tbn 3aand9gcrxs6ugd7r4lknf5wj0cbyrvk4k5xssern52g Usqp Cau

3 Benefits Of Using Revit View Filters Cadnotes Filters Doors And Floors Views

Trim Interscting Roofs Autodesk Community Revit Products

Intro To Massing And Curved Curtain Wall Systems In Autodesk Revit 2014 Wall Systems Homemade Curtains Luxury Curtains

Revit To Indesign Indesign Bim Image
Roof View Range Autodesk Community Revit Products

Revit Sloped Beam System Cadclip Youtube

Revit Create Slanted Walls The Easy Way Youtube

Modeling A Tensile Fabric Roof In Revit Building Information Modeling Revit Architecture Architecture Program

Tutorial Conceptual Massing And Revit Structure 2014 Conceptual Tutorial Illuminati

Unable To Get Proper Room Volume With Sloped Roof Autodesk Community Revit Products

Pin De Lentigginka Em Revit Em 2020 Revit

Creating An In Place Mass Wall Workout Revit Family Create

Solved Roof Structure Autodesk Community Revit Products

Autodesk Revit Tutorials 05 Adding The Roof Revit Tutorial Autodesk Revit Tutorial

Revit 1 7 Roofs Hip Gable Dormer Revit Tutorial Revit Tutorial Dormers Ceiling Plan
Https Encrypted Tbn0 Gstatic Com Images Q Tbn 3aand9gcqt Jag1pa Hofhz 59fqg8i0feamtfelr0xlmsrdq6chiqvxbg Usqp Cau

How To Modify The Side Contour Of A Wall Architecture Program New Surface Roof Beam

Revit 2d Details Part 3 Organising And Reusing Details Organization Autocad Revit Autodesk Revit

Youtube Wall Cladding Cladding Revit Architecture

Revit Corrugated Sheeting

Autodesk Revit Sloping Curved Walls Youtube

Solved Autodesk Revit 2020 Constraints Properties Issue On Wall And Level Autodesk Community Revit Products

Solved Circular Building Woes Pitched Circular Flat Roof Doors Copying And Pasting Autodesk Community Revit Products

Bim Revit 3d Organic Form 03 Tensile Structure Youtube Form Architecture Tensile Structures Organic Form

9 Tips To Understand Revit Roofs Revit Pure

Revit Roof Slope Arrow

Revit Piezas En Muros Youtube Muros Construccion Arquitectos

How To Create A Sloped Work Plane In Revit Autodesk Community Revit Products

7 Tips To Understand Slanted Walls In Revit Revit Pure

Revit Structure Modeling Wood Columns Beams And Floors Wood Columns Beams Architecture Presentation

Winged Gable Roof Design Gable Roof Design Roof Design Gable Roof
Video Create A Dormer Revit Products 2019 Autodesk Knowledge Network

Revit Tips Railing In Frozen Let It Go Frozen Let It Go Revit Architecture Railing

How To Use Revit Architecture S Camera Settings Lynda Com Tutorial Revit Architecture Architecture Camera Settings

Modeling Purlin Properly In Revit 2019 Youtube

Revit Roof Tip 5 Activate Overhang On Picked Walls Roof Youtube

Revit Wall Wrap Closure A How To Guide Youtube

Trapezoidal Wall Cladding Wall Cladding Cladding Revit Architecture

Make Hardscape Follow Topo Revit Tutorial Hardscape Topography

